
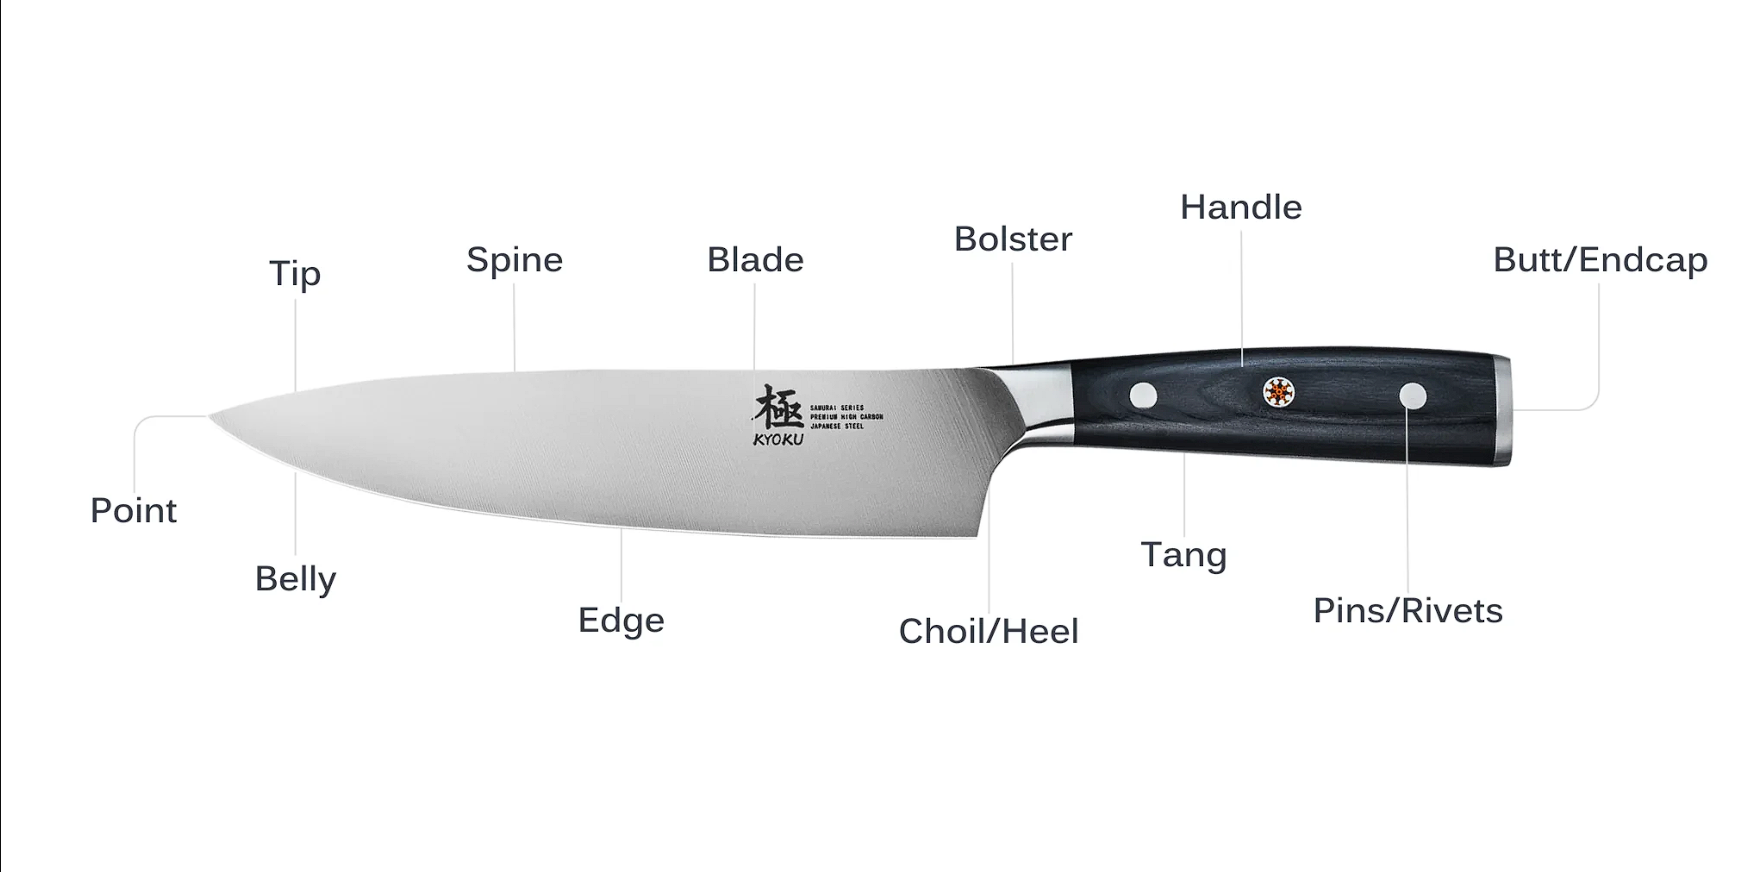

The Art of the Whetstone: A Beginner’s Guide to Sharpening
In the age of "instant everything," it’s tempting to run your premium Kyoku boning knife blade through a $10 pull-through sharpener and call it a day. But if you’re treating a high-carbon Japanese blade like a common hardware store tool, we need to have a little "heart-to-heart."

A Samurai would never let a machine touch his katana, and neither should you.
Using a whetstone isn't just maintenance; it’s a meditative ritual that reconnects you with your blade. It’s the difference between "shaving" an onion and merely "smushing" it. Today, we’re breaking down the barrier to entry and showing you that the whetstone is nothing to be intimidated by.
Why the Whetstone Wins Every Time
Standard pull-through sharpeners are aggressive. They "chew" the steel, removing far more metal than necessary and often leaving a jagged, uneven edge.
A Whetstone, on the other hand:
● Respects the Steel: It allows you to maintain that precise 13–15° Kyoku santoku knife angle.
● Increases Longevity: You only remove exactly what you need to, extending the life of your knife by years.
● The Sharpest Edge Possible: A stone-honed edge is "scary sharp"—the kind that glides through a tomato skin with zero pressure.
Understanding the Grit: Your Roadmap to Sharp
Whetstones are categorized by "grit" numbers. The lower the number, the coarser the stone.
Grit Range Purpose Analogous To...
400 – 800 Repairing Fixing chips or a very dull, "dead" edge.
1000 – 2000 Sharpening The "workhorse" grit. This is your everyday sharpener.
3000 – 8000 Polishing Refining the edge to a mirror-like, surgical finish.
Kyoku Pro Tip: For most home cooks, a double-sided 1000/6000 grit stone is the ultimate duo. Use the 1000 to sharpen and the 6000 to polish the soul of the blade.
Step-by-Step: The Way of the Stone
1. The Soak
Most whetstones are "water stones." Submerge your stone in water for about 10–15 minutes until bubbles stop rising. Keep a spray bottle or a bowl of water nearby—the stone must stay wet while you work to create the "slurry" (the grey mud that actually does the sharpening).
2. Find Your Angle
For your Kyoku knife, you’re aiming for roughly 15 degrees.
● The Trick: Place two quarters stacked on the stone, then rest your knife spine on them. That’s your angle. Once you feel it, remove the coins and try to lock your wrist in that position.
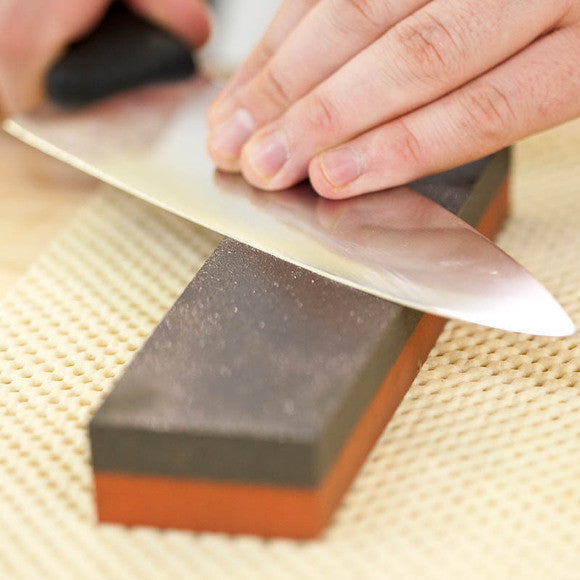
3. The Motion
Hold the handle with your dominant hand and use the fingers of your other hand to apply pressure to the edge. Move the blade in long, smooth strokes across the stone.
4. Feel for the "Burr"
This is the secret most beginners miss. After several passes, run your thumb away from the edge (carefully!) on the opposite side of the blade. You should feel a tiny, microscopic wire or "lip" of metal. This is the burr. Once you feel it from tip to heel, flip the knife and repeat on the other side.
5. The Polish
Switch to your higher grit (6000) stone. This stage isn't about removing metal; it’s about smoothing out the scratches from the coarse stone. Use lighter pressure here to achieve that Kyoku mirror-shine.
The Paper Test
The moment of truth. Hold a single sheet of printer paper and try to slice through it using only the weight of the knife. If it glides through without snagging, congratulations—you’ve mastered the art.
The Zen of Maintenance
Don't wait until your knife is "butter-knife dull" to use the stone. Five minutes on a high-grit stone once a month will keep your Kyoku blade in peak Samurai condition indefinitely.